
HOW TO LABEL STANDS
In many wargames, the various stands need to be readily identifiable. There are a variety of ways to denote what each stand is and/or which group of stands it belongs with during a game. Over time, I've developed my own tastes for how this is done. For Flames of War in particular, I developed my own method of making labels that fit on the bevel of each base. This method is easily adapted to other games as well.
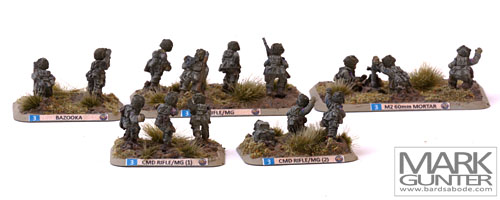
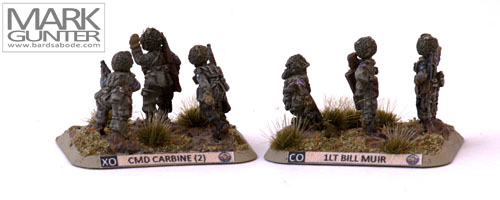
As an example of what these labels can produce, below are a pair of images of some Battlefront Miniatures 15mm World War II models for Flames of War. In this case, these are teams for Able Company, 101st Airborne. From left to right, the label features a colored block with platoon number, team identifier text, and the 506th patch. To differentiate command stands, the color block is always black and often the stand gets a personal name rather than a team type.
These are simple, paper labels printed on normal paper. It is then cut out and glued onto the base, using basic PVA glue (ie. Elmer's Glue). Apply the label after any finishing coat on the model in question. The glue is adequate to hold the label in place and applying it to a completed model allows it to be easily removed in the future. Adding a coat of sealer on top of the label will make such removal problematic.
Full instructions can be found in the FoW Labels file (MS Excel 97-03 .xls) that I created for the purpose of designing my labels. The process can be replicated in similar programs that allow you to print at a reduced size. In Excel, I print the finished product at 25% of the document size. A little experimentation should give you good results with minimal effort. The key is to make the label what YOU want it to be.